Hi,
Frank and I started the long awaited revamp of the clubs 12" scope last night, we cleaned both mirrors as best we could. We centered dotted both mirrors to aid collimation.
We put a hatch in by the primary mirror so that we can get access to the mirror, this hatch also acts as a lid/cover for the primary mirror.
Here is a list of what I think should be done to the scope to get it fully operational and in this order also (all the easy stuff first)...
1, Put in another hatch in by the secondary so we can properly collimate it using the laser as its very difficult to see if the laser is hitting the center dot on the secondary mirror at the moment, we have the hinge and lock for it.
2, We need to get a sheet of marine ply and remake the rockerbox/ground base of the scope.
3, We need to get some telfon and new Formica (I have some spare) for the the azimuth axis bearing and get a cheap bolt and nut to hold it all together.
4, We really need to get some wood preservative and varnish on all the woodwork.
5, I think it would be cheap and easy enough to make up a new primary mirror cell using square metal tubing and a sling, like an obsession cell, the one that is there at the moment is a disaster and is fit for the bin as it is unstable.
6, We need to get a new 2" focuser, as a 1.25" focuser is not adequate.
7, The primary and especially the secondary mirrors are in need of re-coatings.
Well, what do you think ??
Revamp of club 12" Dob scope commences.
Moderator: SAC Committee
-
Dave Lillis
- Posts: 2757
- Joined: Sun Aug 05, 2007 10:02 am
- Location: Limerick city
Revamp of club 12" Dob scope commences.
Dave L. on facebook, See my images in flickr
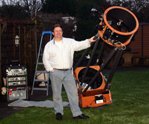
Carrying around my 20" obsession is going to kill me, but what a way to go.
Carrying around my 20" obsession is going to kill me, but what a way to go.
-
Frank Ryan
- Posts: 2980
- Joined: Sun Aug 05, 2007 2:45 am
- Location: Ballycasey, Co. Clare
I got a small Sheet of Marine Ply today in B&Q
for the base. 9'' x 3''
Its 18mm thick so its nice and durable.
I got them to cut it into 3, 3x3 squares.
All I need now is the Formica from you Dave.
I also got 3 big teflon slider pads that have a metal support and are perfect
for the bottom of the rocker box.
Got an eye hook and nut just the right size.
Got a tin of medium oak exterior wood preserver.
Got a small roller set and sanding block also.
Personally,
I reckon all we should do for now is:
Make the new base
Cut the second hatch & paint the whole thing.
Later on we could look at Making a new mirror cell &
and rocker box.
I'll take a go at it tomorrow Dave if your around?
-
Dave Lillis
- Posts: 2757
- Joined: Sun Aug 05, 2007 10:02 am
- Location: Limerick city
Sounds great to me Frank, give me a call about it when you're ready.
We should take pics before and after for comparison.
We should take pics before and after for comparison.
Dave L. on facebook, See my images in flickr
Carrying around my 20" obsession is going to kill me, but what a way to go.
Carrying around my 20" obsession is going to kill me, but what a way to go.
-
John O'Mahony

- Posts: 552
- Joined: Sun Aug 05, 2007 8:36 am
- Location: Limerick, Ireland
-
Dave Lillis
- Posts: 2757
- Joined: Sun Aug 05, 2007 10:02 am
- Location: Limerick city
All receipts are been kept John, we can have a good talk about this at the club meeting on Wednesday.
Dave L. on facebook, See my images in flickr
Carrying around my 20" obsession is going to kill me, but what a way to go.
Carrying around my 20" obsession is going to kill me, but what a way to go.
-
Frank Ryan
- Posts: 2980
- Joined: Sun Aug 05, 2007 2:45 am
- Location: Ballycasey, Co. Clare
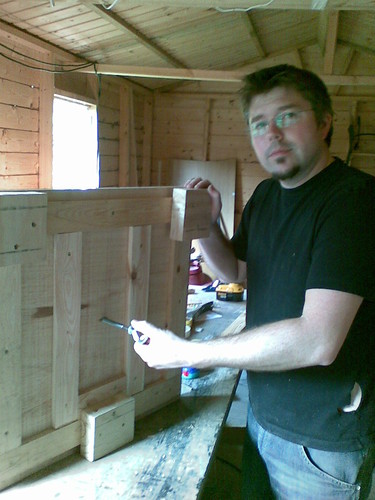
Well we spent the whole day on this today at my workshop.
From Midday to 9PM pretty much straight through! Phew!!
First up, we had a look at the old base.
Simply put it was in such bad repair that it needed to be rebuilt from scratch.
We used some of the marine ply I got cut in B&Q.
Attached a new piece of formica Dave had and added struts on the bottom
to add support and to allow a tri-pod base leg to be attached for balance.
The new eye bolt turned out to be just the right size and when threaded through
and bolted down the bottom of the scope clears it nicely.
Then we took a look at the rocker box.
The teflon pads on the botom looked shot so we tried some furniture savers I had picked up.
They were the perfect size but after a dry run we decided to use the old
teflon ones as they offered better glide action.
A quick fine sanding and they were as good as new.
We cut a new section for the bottom of the scope from some more of the
new marine ply as the origional bottom we warped and impeeding the
glide action and attached this.
Next up was to cut the second longer hatch at the top of the scope for
access to the secondary and to aid collimation.
After a good sanding and cleaning it was time to varnish it
(well, time for Dave to varnish it!)
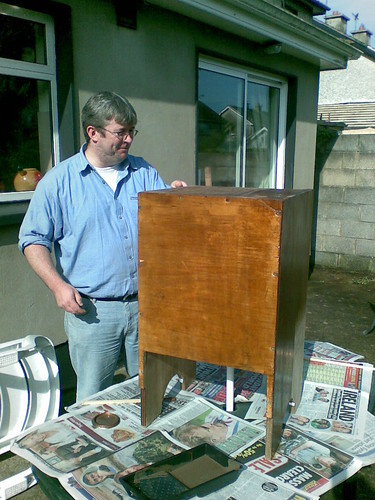
After it dried we put it all together.
The scope was out of balance for before and although there was an improvement we needed to come up with a way to balance it properly.
The solution was to solder a length of lead came around the aperture
opening of the box.
Sounds mad but it worked out perfectly and looks good too!
We tried to collimate it with the laser but because the focuser is a bit
out of date we ran into a bit of trouble.
Having said that, the mirror cell let us down also.
We really need to look at re-housing it.
Just lifting the scope off the rocker box knocks it out.
So,
left on the list.
1 - New Mirror Cell
2 - Re- coat mirrors
3 - Re-paint inside black.
4 - Make a cover for the mirror.
5 - Handles for the sides
6 - New Formica
7 - New teflon pads.
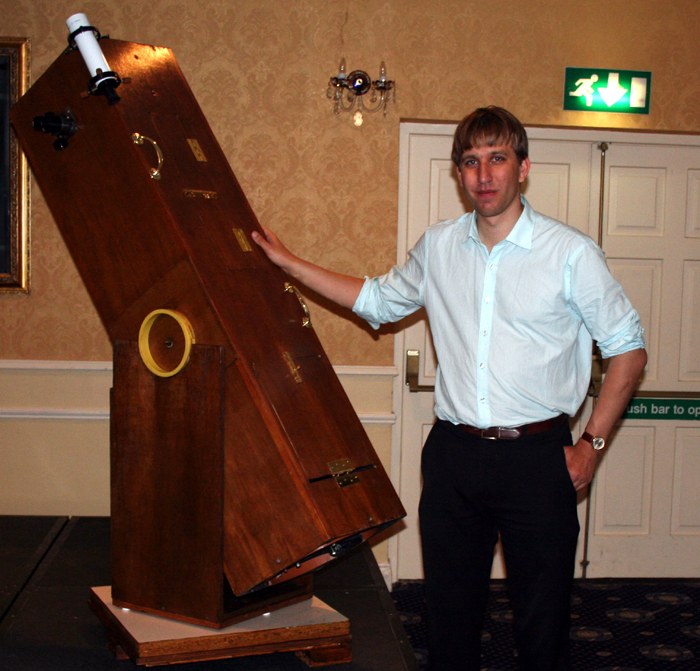
For now it looks like this:
(Looks even better in reality! )
)
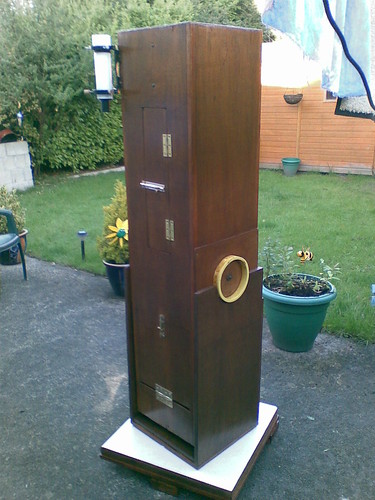
So, I'll bring it along next Wednesday and let ye take a look at our efforts so far!
From Midday to 9PM pretty much straight through! Phew!!
First up, we had a look at the old base.
Simply put it was in such bad repair that it needed to be rebuilt from scratch.
We used some of the marine ply I got cut in B&Q.
Attached a new piece of formica Dave had and added struts on the bottom
to add support and to allow a tri-pod base leg to be attached for balance.
The new eye bolt turned out to be just the right size and when threaded through
and bolted down the bottom of the scope clears it nicely.
Then we took a look at the rocker box.
The teflon pads on the botom looked shot so we tried some furniture savers I had picked up.
They were the perfect size but after a dry run we decided to use the old
teflon ones as they offered better glide action.
A quick fine sanding and they were as good as new.
We cut a new section for the bottom of the scope from some more of the
new marine ply as the origional bottom we warped and impeeding the
glide action and attached this.
Next up was to cut the second longer hatch at the top of the scope for
access to the secondary and to aid collimation.
After a good sanding and cleaning it was time to varnish it
(well, time for Dave to varnish it!)
After it dried we put it all together.
The scope was out of balance for before and although there was an improvement we needed to come up with a way to balance it properly.
The solution was to solder a length of lead came around the aperture
opening of the box.
Sounds mad but it worked out perfectly and looks good too!
We tried to collimate it with the laser but because the focuser is a bit
out of date we ran into a bit of trouble.
Having said that, the mirror cell let us down also.
We really need to look at re-housing it.
Just lifting the scope off the rocker box knocks it out.
So,
left on the list.
1 - New Mirror Cell
2 - Re- coat mirrors
3 - Re-paint inside black.
4 - Make a cover for the mirror.
5 - Handles for the sides
6 - New Formica
7 - New teflon pads.
For now it looks like this:
(Looks even better in reality!
So, I'll bring it along next Wednesday and let ye take a look at our efforts so far!
-
Dave Lillis
- Posts: 2757
- Joined: Sun Aug 05, 2007 10:02 am
- Location: Limerick city
She's a beauty now, especially compared to what it did look like, see
http://shannonsideastronomy.com/phpBB2/ ... c.php?t=16
I'll make up a drawing for the primary mirror cell and then figure out what materials we need for it.
As for recoating the mirrors, I did a quick look around and found
http://www.galvoptics.fsnet.co.uk/telescope7.htm
Its not nearly as expensive as I thought it would be. !
Any chance of a few more shots of it Frank, in the one above it looks like a closet
For the club logo, this is probabily the best and biggest version of the logo I have.

http://farm2.static.flickr.com/1095/146 ... ff66_o.jpg
http://shannonsideastronomy.com/phpBB2/ ... c.php?t=16
I'll make up a drawing for the primary mirror cell and then figure out what materials we need for it.
As for recoating the mirrors, I did a quick look around and found
http://www.galvoptics.fsnet.co.uk/telescope7.htm
Its not nearly as expensive as I thought it would be. !
Any chance of a few more shots of it Frank, in the one above it looks like a closet
For the club logo, this is probabily the best and biggest version of the logo I have.
http://farm2.static.flickr.com/1095/146 ... ff66_o.jpg
Dave L. on facebook, See my images in flickr
Carrying around my 20" obsession is going to kill me, but what a way to go.
Carrying around my 20" obsession is going to kill me, but what a way to go.
-
Frank Ryan
- Posts: 2980
- Joined: Sun Aug 05, 2007 2:45 am
- Location: Ballycasey, Co. Clare
Those price for re coating the mirror are excellent!
We really need to do this now, or it will never be done.
As for the Logo.
I've started the stencil for it and should be able to do the artwork on Wed evening.
I was thinking again about where it would look best and to be honest,
I reckon on the front of the rocker box is the best.
(see the photo of it and Harry above in the link)
Remember we need to put those handles on to it also.
(I found a pair of cool 'Victorian style' cup handles in B&Q that
are in keeping with the old design:
http://www.eclectic-ware.com/Eclectic-w ... ishes2.JPG )
I also had a chat with a guy I know in Irish Wire on the Dock Road and
he reckons he has off cuts of the shiny formica in the stores,
I'll just have to drop in there some time after the whirlpool to pick it up.
I'll take a better shot of it tomorrow evening and put it up here.
-
Dave Lillis
- Posts: 2757
- Joined: Sun Aug 05, 2007 10:02 am
- Location: Limerick city
I'd be reluctant to do this until we have a good cap for the primary, you saw how much dust got on it in only 3 days. Once done, I agree, the coatings are top priority.Frank Ryan wrote:Those price for re coating the mirror are excellent!
We really need to do this now, or it will never be done.
I thought you were happy with it below the altitude bearing yesterday?, on the side of the scope, it would be better on 2 sides, if it was only one side it would be the eyepiece side I guess. This would be a far more prominent position as it would be clearly visible by anyone using, approaching the scope. If we had the scope as WSP, it would look excellent to have it all done either way up on the stage, below the lit up plough..., only a thought.Frank Ryan wrote: I was thinking again about where it would look best and to be honest,
I reckon on the front of the rocker box is the best.
(see the photo of it and Harry above in the link)
Fair enough if its on the front instead, can we have something like S.A.C on the sides aswell, the sides are just screaming out for something to be there.
They look nice but would not more conventional shaped handles like below give you a better grip? If the scope tilted, you'd loose your grip?Frank Ryan wrote: Remember we need to put those handles on to it also.
(I found a pair of cool 'Victorian style' cup handles in B&Q that
are in keeping with the old design:
http://www.eclectic-ware.com/Eclectic-w ... ishes2.JPG )
http://houseofantiquehardware.com/s.nl; ... =A&id=6847
although I don't fancy paying 10e a handle
Great, that would be handy if he had it!.Frank Ryan wrote: I also had a chat with a guy I know in Irish Wire on the Dock Road and
he reckons he has off cuts of the shiny formica in the stores,
I'll just have to drop in there some time after the whirlpool to pick it up.
Dave L. on facebook, See my images in flickr
Carrying around my 20" obsession is going to kill me, but what a way to go.
Carrying around my 20" obsession is going to kill me, but what a way to go.
-
Frank Ryan
- Posts: 2980
- Joined: Sun Aug 05, 2007 2:45 am
- Location: Ballycasey, Co. Clare
Now here is a photo I never thought I'd see!
Dr. Chris Lintott at the Whirlpool starparty
Dr. Chris Lintott at the Whirlpool starparty
Last edited by Frank Ryan on Fri Oct 19, 2007 12:40 am, edited 1 time in total.
-
Dave Lillis
- Posts: 2757
- Joined: Sun Aug 05, 2007 10:02 am
- Location: Limerick city
What a picture !!! did you ever thought you'd see the likes. 
Fair play to Chris Lintott for been great craic !
Fair play to Chris Lintott for been great craic !
Dave L. on facebook, See my images in flickr
Carrying around my 20" obsession is going to kill me, but what a way to go.
Carrying around my 20" obsession is going to kill me, but what a way to go.
-
Frank Ryan
- Posts: 2980
- Joined: Sun Aug 05, 2007 2:45 am
- Location: Ballycasey, Co. Clare
Dave,Dave Lillis wrote:
I'll make up a drawing for the primary mirror cell and then figure out what materials we need for it.
As for recoating the mirrors, I did a quick look around and found
http://www.galvoptics.fsnet.co.uk/telescope7.htm
Its not nearly as expensive as I thought it would be. !
do you still want to design and make the mirror cell?
I am pricing around for one along with the rest of what we need
- Formica
- Teflon Pads
etc.
Also
What kind of finder system would you suggest?
I would also suggest a laser pointer holder also so we
can use it for club events / schools etc.
So if you want do you think you could suggest / price these things?
Although making the cell is one thing,
I would prefer to spend the little bit extra to just get them asap.
We really should aim to have this scope ready for the end of October.
If we have this for the Burren sessions it will be awesome.
-
Dave Lillis
- Posts: 2757
- Joined: Sun Aug 05, 2007 10:02 am
- Location: Limerick city
Hey Frank,
As you saw, I got the focuser which was a very handy buy!.
I was talking to Phil Lardner as WSP this year regarding mirror cells and him been as good an expert as I'll ever meet on these things recommended that we build a wooden cell and after abit of thinking about it, its definitely the way to go, all that welding of a metal system makes it a serious task, a wooden system become alot easier to make.
Building a wooden sell still requires which purchase a sling holder which we can source from obsession telescopes and are not expensive.
We'll have to have a serious look at the secondary + secondary mirror and see if it needs complete replacing or will just recoating it do.
As for a finder, we have a 8x50 but would seriously recommend we get a telrad for it, we can get a laser and holder for the wow factor for school trips and all that, I find for serious observing I dont use the laser I have.
The end of October is achievable.
Dave L. on facebook, See my images in flickr
Carrying around my 20" obsession is going to kill me, but what a way to go.
Carrying around my 20" obsession is going to kill me, but what a way to go.
-
Frank Ryan
- Posts: 2980
- Joined: Sun Aug 05, 2007 2:45 am
- Location: Ballycasey, Co. Clare
Great!
Lets get the ball rolling so.
I was chatting to Phil also next to the scope and he offered
a few tips.
He suggested that we (along with changing the base to a smoother formica)
to move the Teflon pads on the base in slightly and to have one of the 3 just beside the centre point (making a more stable tripod and also easyer to move)
He then suggested 4 Teflon pads on the body of the scope that align with
the rocker box which would help to remove the sideways give when
adjusting declination.
(Good man Phill!)
I have also a design in mind for a protective lid for the top.
-
Dave Lillis
- Posts: 2757
- Joined: Sun Aug 05, 2007 10:02 am
- Location: Limerick city
All things that can be easily done.
How about a stained glass lead hinged lid for the top of the scope, it would look awesome
How about a stained glass lead hinged lid for the top of the scope, it would look awesome
Dave L. on facebook, See my images in flickr
Carrying around my 20" obsession is going to kill me, but what a way to go.
Carrying around my 20" obsession is going to kill me, but what a way to go.