Revamp of club 12" Dob scope commences.

Moderator: SAC Committee

User avatar
Dave Lillis
Posts: 2757
Joined: Sun Aug 05, 2007 10:02 am
Location: Limerick city

Post by Dave Lillis » Thu Feb 16, 2012 11:31 am

well, I had my doubts that it would be stable, Roy was over last night and had a look , we both agree its the bees, knees, I got 2 metal plates where the thread bar goes through, makes it surprisingly solid, and rotates like any other dob out there, no more heaving !! :lol: :lol:

I've ordered the counterweight system, and asked Howie Glatter for the tublug, just no way can I get it second hand.
Only thing is that Howie is away till 28th of Feb. :cry:
I'm getting all parts shipped to my friend and he'll forward them on, saves on shipping if you know what I mean :twisted: , it'll be mid March before we have the parts I reckon.


and your right there Frank, no need for any glass.
Dave L. on facebook, See my images in flickr
Carrying around my 20" obsession is going to kill me, but what a way to go. :)

User avatar
Dave Lillis
Posts: 2757
Joined: Sun Aug 05, 2007 10:02 am
Location: Limerick city

Post by Dave Lillis » Wed Mar 14, 2012 7:32 pm

right lads,
the counterweight system came today and is now fitted, scope now easy to balance in every situation.
I also fitted the altitude formica bearing surfaces, they're the bees knees, very smooth. The tublug came aswell, works great !
All other extras+bits'n pieces are now on the scope, all done,
I cannot think of anyway of improving/modifing the scope except for recoating the mirrors, something we can do later this year or next year.
I'll put pics up later.

Gordon, I'll be on to you looking for a cheque for all the parts bought. :)
Last edited by Dave Lillis on Thu Mar 15, 2012 3:55 pm, edited 1 time in total.
Dave L. on facebook, See my images in flickr
Carrying around my 20" obsession is going to kill me, but what a way to go. :)

Roy Stewart
Posts: 531
Joined: Sun Sep 26, 2010 4:29 pm
Location: Meelick, Co.Clare

Post by Roy Stewart » Wed Mar 14, 2012 8:10 pm

Nice1 Dave.. Sounds perfect..
All its short now is a go-to
but maybe that might kill
the old school look and feel
of 1 of the best 12" dob's out
there today...

Cheers Roy :D :D
Roy Stewart.

User avatar
Dave Lillis
Posts: 2757
Joined: Sun Aug 05, 2007 10:02 am
Location: Limerick city

Post by Dave Lillis » Thu Mar 15, 2012 3:49 pm

Dave L. on facebook, See my images in flickr
Carrying around my 20" obsession is going to kill me, but what a way to go. :)

User avatar
Dave Lillis
Posts: 2757
Joined: Sun Aug 05, 2007 10:02 am
Location: Limerick city

Post by Dave Lillis » Thu Mar 15, 2012 3:53 pm

Roy Stewart wrote: All its short now is a go-to
but maybe that might kill
the old school look
well, I was looking at it again from a goto-ising point of view, and guys, it would cost a severe amount of money...
and tbh would probabily require a rebuild of the "rockerbox" of the scope.
It cost 2 grand to goto-ise my 20 inch, you'd probabily use a servocat jr as oppossed to a straight up servocat for this scope, I could see it costing over 1.5k to do it.
Not on the cards.
Dave L. on facebook, See my images in flickr
Carrying around my 20" obsession is going to kill me, but what a way to go. :)

User avatar
Dave Lillis
Posts: 2757
Joined: Sun Aug 05, 2007 10:02 am
Location: Limerick city

Post by Dave Lillis » Sat Mar 17, 2012 8:15 pm

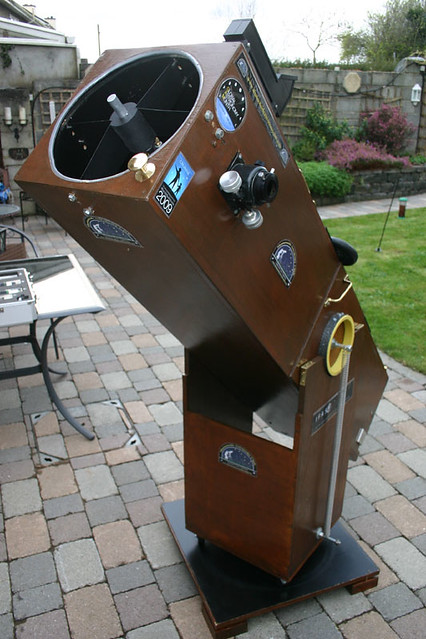
ok guys, here is the end product.
Image
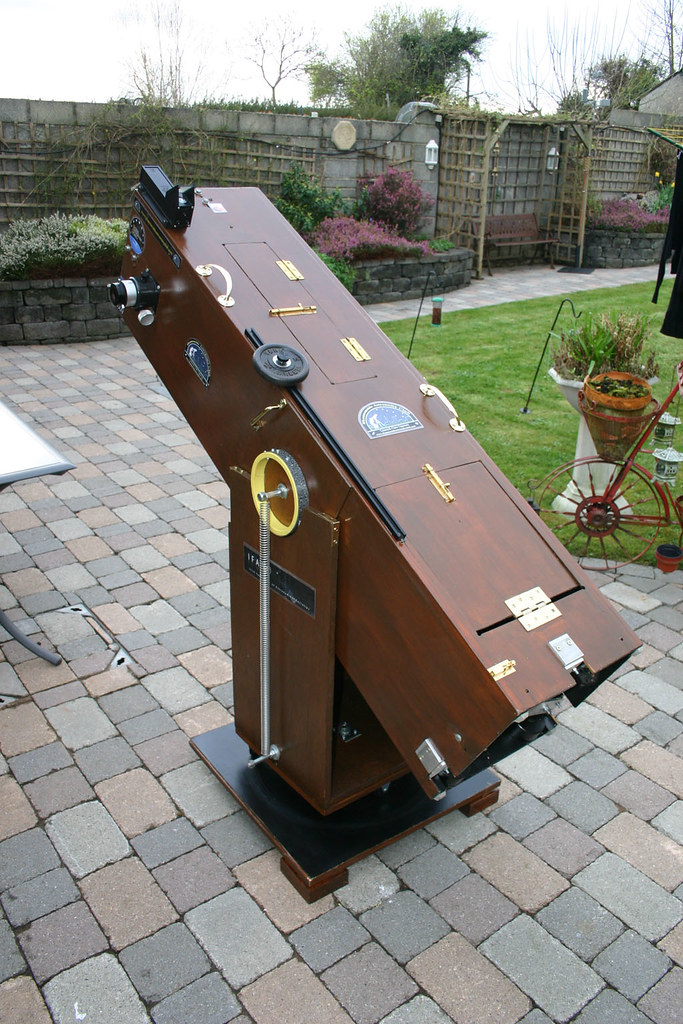
To describe the additions and changes I've done to it over the past month,
1, if you look closely you'll see rubber feet on the end of the OTA.
2, the new counter rail + weight is pretty obvious.
3, the formica bearings are now stuck onto the teflon, far better action
4, the new casterwheels under the rocker box.
5, the square metal plate inside the rockerbox, gives a smoother turning motion.
6, a locking bolt towards the bottom of the OTA, helps keeping the scope vertical when storing
7, Brass L shapped bends for the top edges of the rockerbox, gives it a nice finish
8, fresh new LOGO's
9, repair of the focuser, now as smooth as new
10, removal of unneeded counter weight at base of OTA.
11, recoat of internal black paint
12, position of telrad in its best possible location.
13, brass holder on the front of the scope, somehting to grab onto when making tiny movements through the eyepeice.
14, nice new shiny varnish coat :)

So thats it, all done now except the mirror recoating and that can wait.

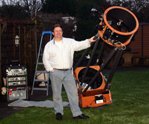
Look at what it used to look like back in 2004, with Harry next to it.
ImageImage

I'm glad we saved it !! 8) 8)
Last edited by Dave Lillis on Sat Mar 17, 2012 10:46 pm, edited 1 time in total.
Dave L. on facebook, See my images in flickr
Carrying around my 20" obsession is going to kill me, but what a way to go. :)

Simon Kenny
Posts: 527
Joined: Tue Feb 12, 2008 9:17 pm
Location: Shannon, Co. Clare, Ireland

Post by Simon Kenny » Sat Mar 17, 2012 8:33 pm

Dave it looks magnificant - a fantastic job

Simon

Post Reply